
The eResidentCare Time Clock feature allows staff to clock in and clock out directly from the dashboard. Depending on assigned permissions, users may also be able to view, create, edit, and manage time entries.
Clock In
Users with Time Clock permissions will see the Time Clock icon on the dashboard banner.
When a user logs into eResidentCare, the Clock In window automatically opens.
To Clock In
- Enter an optional note if desired.
- Click Confirm Clock In.
The system records the clock-in time automatically. Users cannot change the clock-in time from this screen.
If the user clicks Cancel, no clock-in record is created.
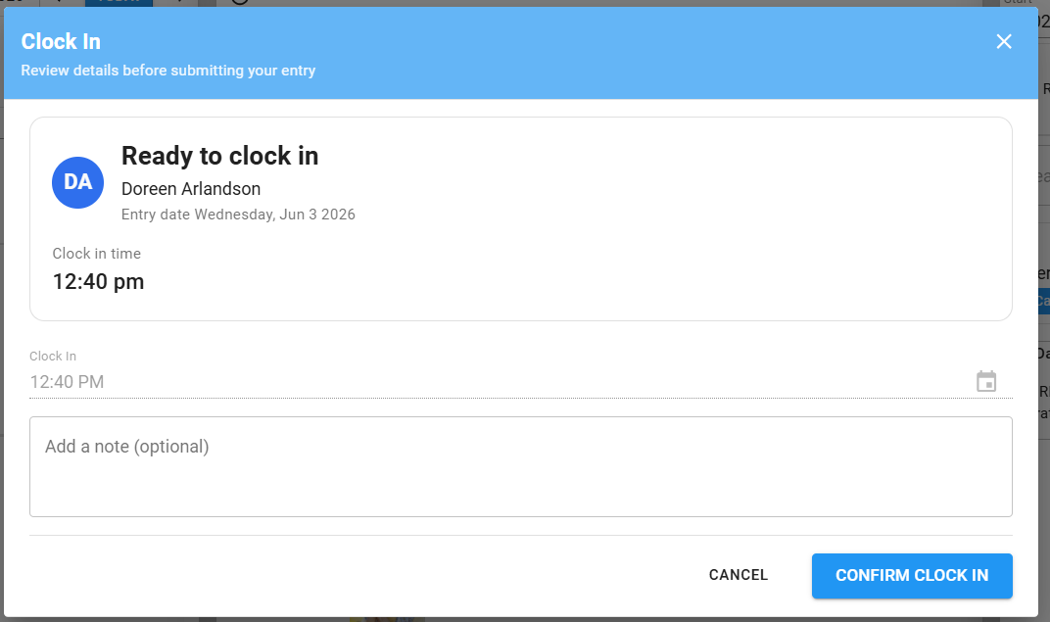
Figure 1 - Clock in
View Time Entries
The Time Clock menu includes the option View Time Entries.
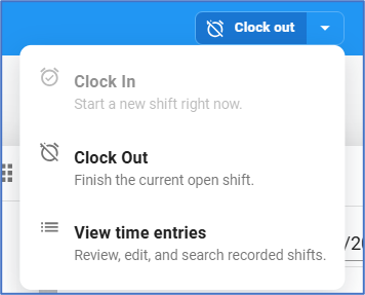
Figure 2 - Clock-in Menu
Users can review their recorded shifts and navigate between weeks using the Previous and Current Week buttons.
Staff Basic Users
- View their own time entries
- Review notes and tags
- Search and navigate previous weeks
- Read-only access
Staff Editor Users
In addition to viewing entries, Staff Editor users can:
- Create time entries
- Edit their own time entries
- Delete their own time entries
To edit an entry:
- Click inside the Start Time or End Time field.
- Enter the new time.
- Save the changes.
Time should be entered using AM or PM format.
Example:
- 08:00 AM
- 03:00 PM
Each entry includes a three-dot menu that provides additional options, including deleting an entry.
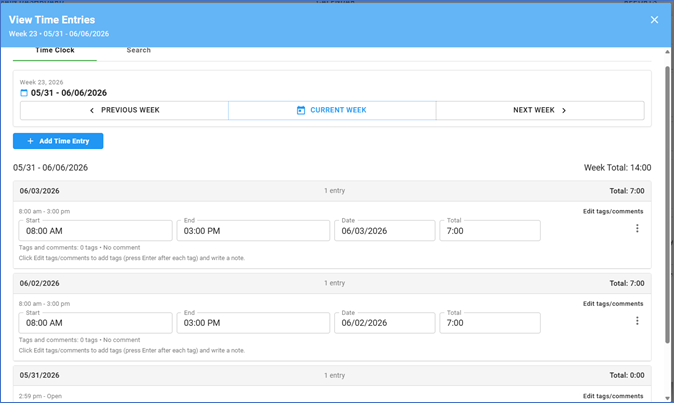
Figure 3 View Time Entries Screen
Time Entry Administration
Administrators have access to the Time Entry management screen from:
Facility Menu → Administration → Time Entry
This screen allows administrators to review and manage time entries for all staff members.
Administrators can:
- View all users
- Search entries
- Filter date ranges
- Add time entries
- Edit time entries
- Delete time entries
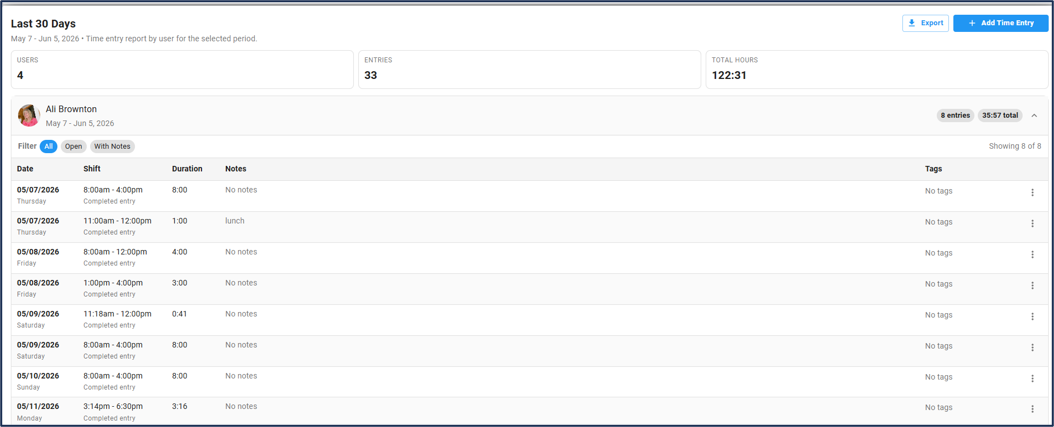
Each staff member can be expanded to display detailed shift information.
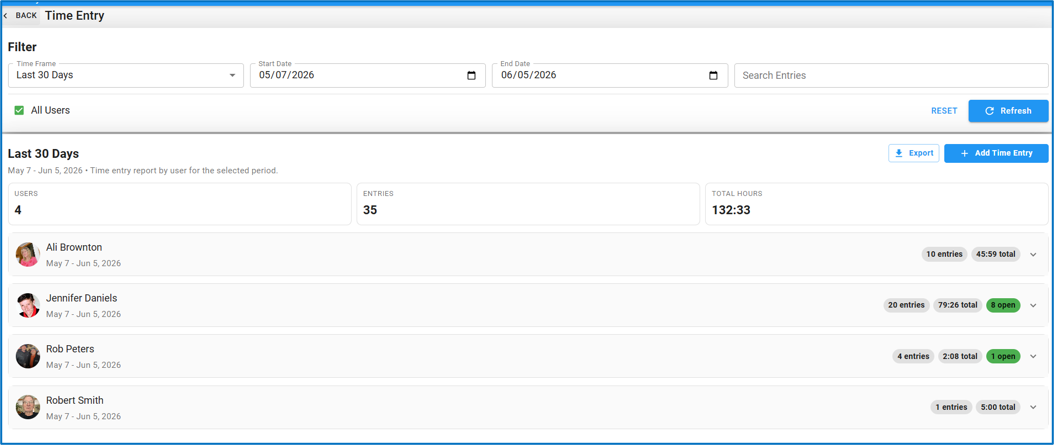
Figure 4 Administration Screens
Managing Entries, Notes, and Tags
The Time Entry Administration screen provides a summary of:
- Number of users in the selected view
- Total entries
- Total hours worked
Each entry displays:
- Date
- Shift duration
- Notes
- Tags
Notes
Notes can be entered by staff during clock in or added later by users with edit permissions.
Example Uses:
- Covering another employee's shift
- Overtime approved
- Training completed
- Shift adjustment
Tags
Tags help categorize and organize time entries.
To create a tag:
- Click in the Tags field.
- Type the tag name.
- Press Enter.
Saved tags appear with a gray background. Click the X to remove a tag.
Example Tags:
- Overtime
- Training
- Shift Coverage
- Meeting
- PTO
Additional Options
Each entry includes a three-dot menu with options to:
- Edit Entry
- Delete Entry
Exporting Data
Administrators can export Time Clock information in:
- PDF format
- CSV format
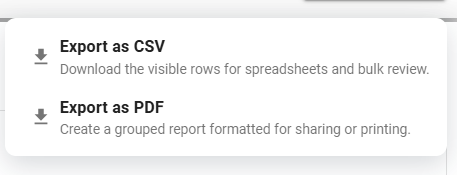
Figure 5 Export to CSV or PDF
Permission Levels
Staff Basic
- Clock In / Clock Out
- View personal time entries
- Read-only access
Staff Editor
- All Staff Basic permissions
- Create personal entries
- Edit personal entries
- Delete personal entries
Admin No Clock
- Manage all staff entries
- No Clock In / Clock Out interface
Admin Plus
- Clock In / Clock Out
- Manage all staff entries
- Full Time Clock administration